Author Topic: My front brake install, with pics.  (Read 16884 times)

Offline jamiemac

  • Full Member
  • ***
  • Posts: 605
  • Country: us
My front brake install, with pics.
« on: June 08, 2012, 06:21:27 PM »
Years ago, I was a pro car tech, with ASE certifications in bakes, chassis, & a master mechanic certification. I learned the ins & outs of brake work through trial & error, plus a lot of great advice from folks wiser than myself. I have been retired from the car repair business for several years, but it was my thing for almost 25.

Our C14 motorcycles, braking system differs from an automobile system in one major way, & that is weight. Other than that difference, almost all on the things that will affect a car system, will affect a bike system. SYSTEM. That is a word that means to me, that all of our bikes brake parts must work together as a whole to function as intended.

Changing the pads to some folks can mean, just removing the old, & installing the new. On a car, this method can work just fine because the parts are much more robust. The rotors are thick & braced with venting vanes between the two halves. The caliper on a car is large, heavy, & usually has an external boot to keep dust & grime from the piston. The pads are larger, & on some cars can be 1/2 inch thick.

Motorcycle rotors are less than 1/4 inch thick, the calipers are small, multi-piston units, & made of aluminum to save weight, & aid in heat dissipation. The pads on our bike are about 5 or 6 mm thick when  new.

Insuring that all of the parts that work together on our bikes is therefore, much more important than on a car.

I hope the few details of My brake job can help folks in the future do theirs.

Here is a shot of the new pads next to the worn ones to show the difference.
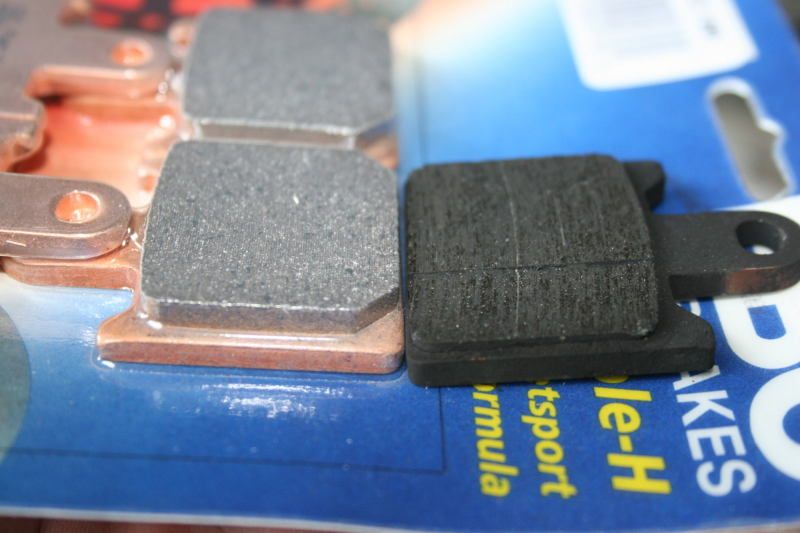


Definitely time.

The replacement of pads is deceptively simple, & it would be easy to neglect some steps that will promote better performance on a bike.

#1 The first thing that needs to be done is get the pad anchor pins loose with the proper sized Allen key.
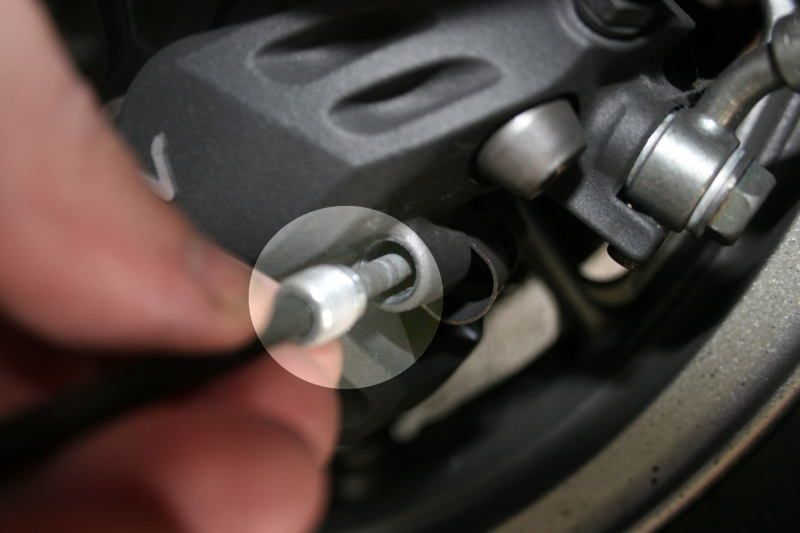
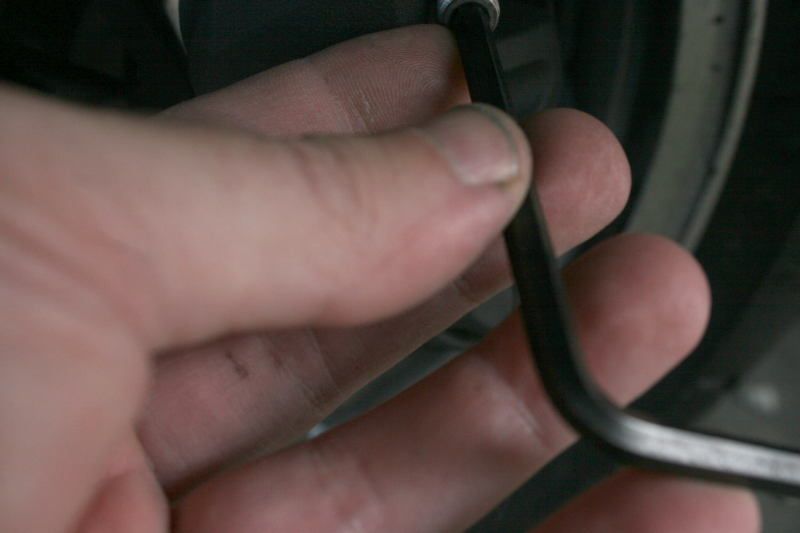


#2 After removing the pins, be sure to take reasonable care with the stainless springs that are designed to hold the pads in place to keep them from rattling. The brakes would probably function without the anti rattle hardware, but would make a lot of noise, & wear uneven.

#3 Here is where doing the bikes brakes take the biggest divergence from doing a car. I always take a solution of warm water, & Dawn dish-washing liquid & an old toothbrush to thoroughly clean the sides of each piston. Removal of all of the dirt is necessary. If it doesn't come off, then I recommend replacing the pistons & seals. They aren't that expensive...although there are 8 of each.
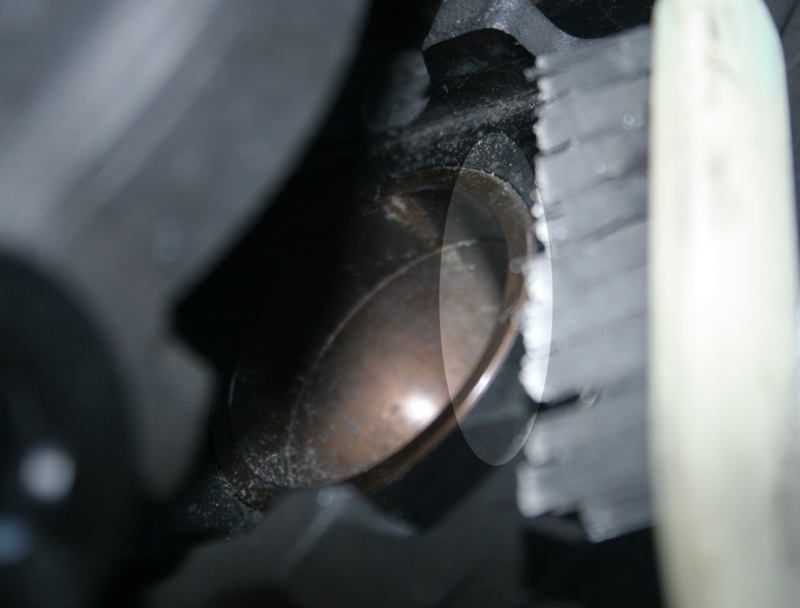


#4 Once the crud is scrubbed from the piston sides that are visible, lightly squirt them with a little brake clean, then use a blue shop towel or paper towel to clean them to a shine.

#5 I find it much easier to work at cleaning the pistons if You take the two larger caliper mounting bolts out, though it probably has to be done to get to the pistons all the way around.
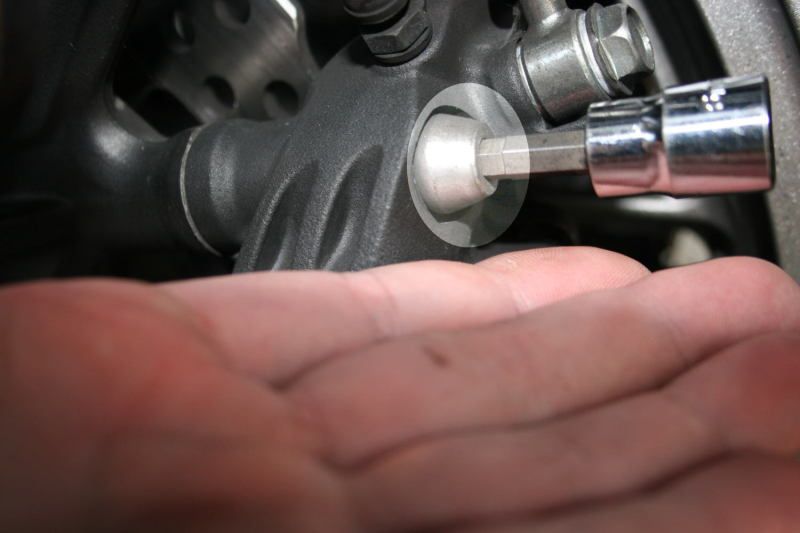


#6 After getting everything clean, it is very easy to push the pistons back in wit Your thumb. If one is being difficult, then there is probably still dirt on it somewhere.

#7 When the pistons are back in, temporarily remount the calipers on the bike with the bolts just snug enough to hold the caliper in place so You can access the bleeder screw.
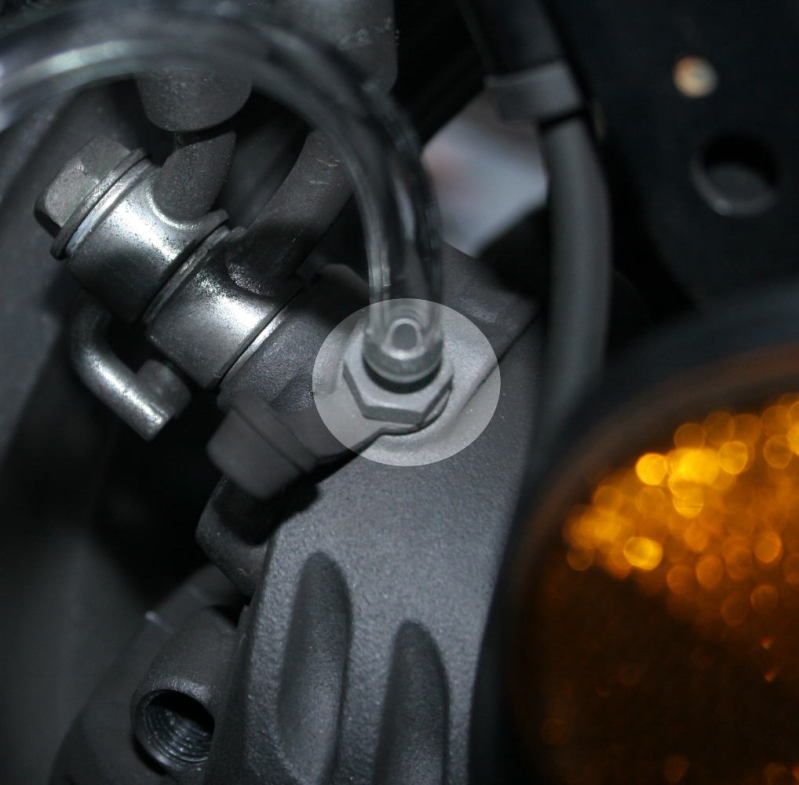


#8 At this point, it is a good idea to pop the cap off of the master cylinder. take a look at the coloration of the fluid. If Your brakes haven't been flushed in a couple of riding seasons, it is a good idea to do that now, along with the clutch system.

#9 Go ahead and fill the master cyl up wit fresh fluid past the full mark, because during the bleeding process, it will drain back down fairly quickly, & you don't want it to get too low. Getting to low could introduce air into the system, & then things become much more difficult without special tools.

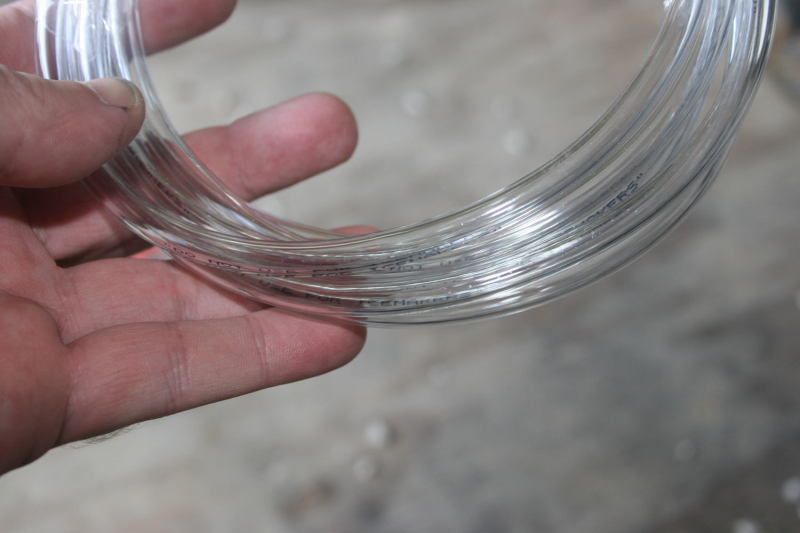
#10 When You have the fluid topped off, attach a piece of 1/4 inch OD clear vinyl tubing to the bleeder screw, & place the other end of the tube in a plastic container.  I cut the top off of an old windshield washer fluid container for this purpose.

Tubing purchased at Home Depot plumbing dept.

2 ft piece of tubing attached to bleeder screw
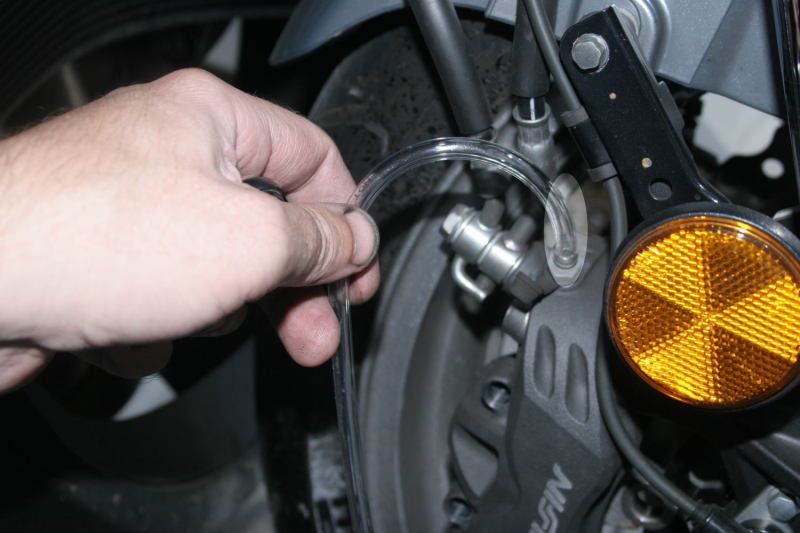

Tubing placed into drain container
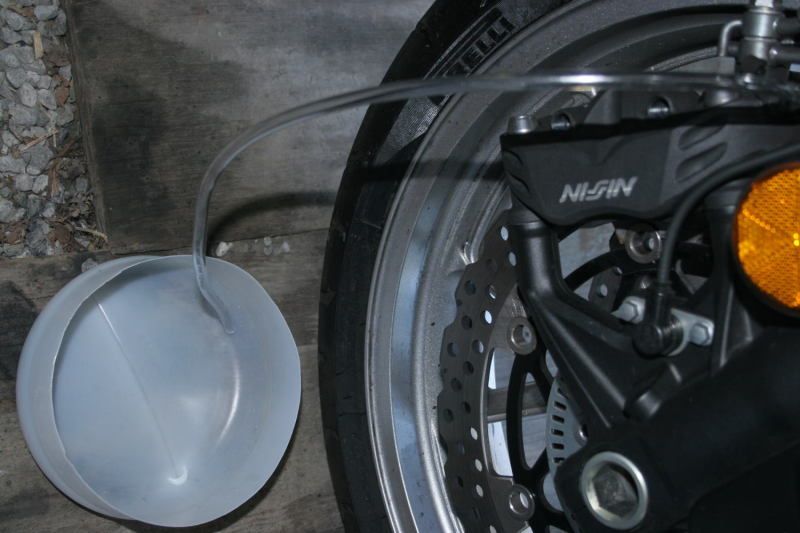

#11 Now it is time to place a 10mm wrench on the bleeder and open it one full turn. Let the fluid drain into the container, & watch the master cylinder as it drains. keep adding fluid to the master cyl as it gets low, and close the bleeder when the fluid is clear again. remember that the brake caliper is aluminum, & so are the threads of the bleeder screw hole. Gorilla style force is not necessary.

#12 Set the cover back on the master cyl to keep out the dirt, and put the screws back in finger tight for safe keeping.

Remember that brake fluid is harmful to paint. I placed painters plastic over the gas tank of My bike. adding fluid to the master cylinder is invariably a messy job, so a little precaution never hurts.

#13 now is time to install the new pads. There is plenty of room with the pistons pushed back in, & BE SURE TO PUT THE BRAKING MATERIAL SIDE TOWARD THE BRAKE ROTOR! I can't stress that last part enough. I have seen that a lot over the years, so don't get distracted. once the pads are in place, replace the stainless hold down hardware. I recommend cleaning the hardware with a brush, so it can be inspected, but it is not necessary for brake function.

#14 It's time to replace the brake pad pins. Again, remember the the threads are aluminum in the pin holes, so use moderate force when replacing the pins. It may be necessary to reach through the brake rotor carrier to hold the opposing brake pad in place, while simultaneously compressing the spring hardware as You insert the pin. Make sure the pin captures the spring hardware, as well as the hole in each brake pad. The pad will fall through the caliper if the pin is not in the hole.
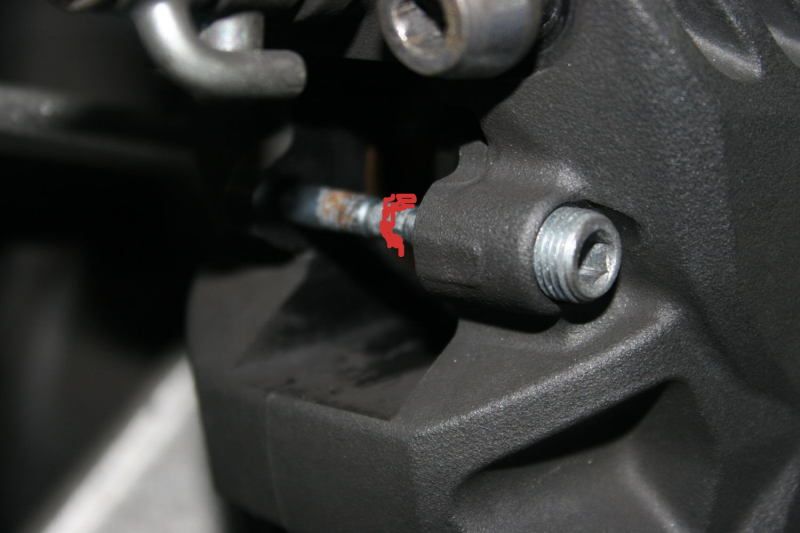


#15 Once all the pads are installed, make sure the master cylinder is filled to the high indicator, & no further. Overfilling the master could lead to the front brakes sticking in the applied position, leading to premature wear & brake fade.

#16 Now that the pads are installed, check that the caliper mounting bolts are loose enough to allow movement of the calipers, but tight enough that they don't flop around. Allowing this movement will let the calipers center themselves as you pump out the pistons.

#17 Slowly pump the pistons out while keeping an eye on the fluid level. once brake pressure has built up, & the pads are in contact with the rotors, make sure the master cylinder is level, & check the fluid level. If some is needed, fill to the full line, & replace the master cylinder cover, then secure the hold down screws. Remember that the fluid reservoir is plastic so be careful.

#18, now go ahead & tighten up the caliper mount bolts. Check to make sure everything is aligned & parallel to the rotor. A good visual inspection is always a fine idea.

#19 The final step is to test ride & do a pad break in. Perform a couple of light stops to make sure everything is working as it should. Then go for a ride & perform some moderate normal stops. After 4 or 5, Your brakes should be good to go.

Now go home & clean up Your mess.

Any questions, I'll be glad to try & answer them.

Hope this helps.  Jamie


So Cal Joe brought up a great issue that I should address. My scoot is a 2008 ABS model, but the newer ones with linked brakes will bleed the same way with 1 exception. That is, that the rear master cylinder controls one of the front brakes, therefore, You need to also fill the rear master cylinder when doing the fluid flush. Even if You don't have an linked brake model, You should do the flush on the rear also. Same as the front.

Thanks for the save, Joe.   Mac


Bolt torque specs. Front brake pad pins: 13 ft lb.  Front brake caliper mounting bolts: 25 ft lb. No locking agent required.


« Last Edit: May 15, 2017, 12:22:37 PM by jamiemac »
2008 C14, Area-P carbon fiber, PCV, Rostra Cruise, LAAM leather seat, Optilux 1500 & MondoMoto MM10 lights, Cee Bailey windshield, BMC air filter, Warm & Safe dual dash mounted heat troller.

Offline 556ALPHA

  • Sr. Member
  • ****
  • Posts: 1284
  • Country: us
  • 2009 Candy Diamond Red
Re: My front brake install, with pics.
« Reply #1 on: June 08, 2012, 07:37:44 PM »
Good stuff and great pictures. Thanks.

Offline jamiemac

  • Full Member
  • ***
  • Posts: 605
  • Country: us
Re: My front brake install, with pics.
« Reply #2 on: June 08, 2012, 07:51:43 PM »
OK. Got the rest of the pics up in the original post. I sometimes take for granted that folks know what I'm talking about, so if I didn't explain something clearly, or glossed over something anyone has a question about, give Me a holler.

Mac
« Last Edit: June 09, 2012, 05:54:12 AM by jamiemac »
2008 C14, Area-P carbon fiber, PCV, Rostra Cruise, LAAM leather seat, Optilux 1500 & MondoMoto MM10 lights, Cee Bailey windshield, BMC air filter, Warm & Safe dual dash mounted heat troller.

Offline speed545

  • Full Member
  • ***
  • Posts: 169
  • Country: ca
Re: My front brake install, with pics.
« Reply #3 on: June 08, 2012, 08:03:01 PM »
wow, great thread. i m about to do the brake job and your thread is right on

thx
08, Concours 14
Montreal Fire Dept

Taff

  • Guest
Re: My front brake install, with pics.
« Reply #4 on: June 08, 2012, 08:21:47 PM »
Nice write up  :goodpost: :thumbs: ;D

Offline jamiemac

  • Full Member
  • ***
  • Posts: 605
  • Country: us
Re: My front brake install, with pics.
« Reply #5 on: June 09, 2012, 06:17:50 AM »
Pictures all up.
2008 C14, Area-P carbon fiber, PCV, Rostra Cruise, LAAM leather seat, Optilux 1500 & MondoMoto MM10 lights, Cee Bailey windshield, BMC air filter, Warm & Safe dual dash mounted heat troller.

Offline mike

  • Full Member
  • ***
  • Posts: 126
  • Country: 00
Re: My front brake install, with pics.
« Reply #6 on: June 09, 2012, 06:58:38 AM »
 :goodpost: Very informative with good pics. Thanks. :chugbeer:

Offline OCK913

  • Arena
  • Full Member
  • ***
  • Posts: 363
  • Country: us
    • The Orlando Riders Club
Re: My front brake install, with pics.
« Reply #7 on: June 09, 2012, 07:30:50 AM »
 :goodpost:  Well written and easy to understand ..... GOOD JOB!   :goodpost:
.............................................................
            2009 Kawasaki C14 - Black

Offline VirginiaJim

  • Administrator
  • Elite Member
  • *****
  • Posts: 11334
  • Country: england
  • I've forgotten more than I'll ever know...
    • Kawasaki 1400GTR
Re: My front brake install, with pics.
« Reply #8 on: June 09, 2012, 08:26:02 AM »
Most Excellent!  :goodpost:
"LOCTITE®"  The original thread locker...  #11  2020 Indian Roadmaster, ABS, Cruise control, heated grips and seats/w/AC 46 Monitoring with cutting edge technology U.N.I.T is Back! Member in good standing with the Knights of MEH.

Offline jamiemac

  • Full Member
  • ***
  • Posts: 605
  • Country: us
Re: My front brake install, with pics.
« Reply #9 on: June 09, 2012, 08:29:16 AM »
Thanks for the move to the right spot, Jim.
2008 C14, Area-P carbon fiber, PCV, Rostra Cruise, LAAM leather seat, Optilux 1500 & MondoMoto MM10 lights, Cee Bailey windshield, BMC air filter, Warm & Safe dual dash mounted heat troller.

Offline m919

  • Jr. Member
  • **
  • Posts: 39
  • Country: us
Re: My front brake install, with pics.
« Reply #10 on: June 09, 2012, 09:17:13 AM »
Nice! You should be the writer for some of these service manuals.
2009 kawasaki concours (red)
1999 honda valkyrie(sold)
2002 honda cb919(sold)

Offline Shoe

  • Full Member
  • ***
  • Posts: 232
  • Country: us
Re: My front brake install, with pics.
« Reply #11 on: June 09, 2012, 09:29:01 AM »
Nice! You should be the writer for some of these service manuals.

I agree.

Everything looks so clean. My tubing is old and yellowed. And my containers are filthy with left over fluids from past jobs. And the calipers look so clean.

The camera shots are in focus.

  ;)  :)
Eat corn. Drill for oil.

2008 Concours, 2010 Goldwing

Offline jamiemac

  • Full Member
  • ***
  • Posts: 605
  • Country: us
Re: My front brake install, with pics.
« Reply #12 on: June 09, 2012, 09:38:50 AM »
Thanks for the props fellas. I'm just tryin to help out. I have read where folks have had some issues with noise & sticking after a brake job, & I had the same issue myself many years ago, when I did the brakes on My 85 ZL900. They had single piston calipers, but sure enough, the brakes started sticking, & I had to rebuild the calipers. Hoping I can prevent a few folks from having to do that.
2008 C14, Area-P carbon fiber, PCV, Rostra Cruise, LAAM leather seat, Optilux 1500 & MondoMoto MM10 lights, Cee Bailey windshield, BMC air filter, Warm & Safe dual dash mounted heat troller.

Offline JerBear

  • Full Member
  • ***
  • Posts: 221
  • Country: us
Re: My front brake install, with pics.
« Reply #13 on: June 09, 2012, 11:23:45 AM »
I really appreciate your post and the thorough job you did pics and all.  It tells me that it’s time for my pads to go (up front) I did not know how little was too little but mine are about the thickness of yours.

Thanks

Btw I only have 15K on her and don't ride the brakes, are they worn out too soon?

Fred might have some competition!
2008 C14 Non-ABS

Offline jamiemac

  • Full Member
  • ***
  • Posts: 605
  • Country: us
Re: My front brake install, with pics.
« Reply #14 on: June 09, 2012, 11:42:20 AM »


Btw I only have 15K on her and don't ride the brakes, are they worn out too soon?

Fred might have some competition!
15 k is about average. I have worn bikes out in 10k, and got 18k out of a set on My old Connie.

No way am I any competition for Fred. His writeups are awesome. I'm mostly a brake guy. Fred's knowledge amazes Me, as does some of the other folks on here. Just hoping I can contribute My little bit of experience.
2008 C14, Area-P carbon fiber, PCV, Rostra Cruise, LAAM leather seat, Optilux 1500 & MondoMoto MM10 lights, Cee Bailey windshield, BMC air filter, Warm & Safe dual dash mounted heat troller.

Offline RideBellChain

  • Full Member
  • ***
  • Posts: 109
  • Country: us
    • RideBellChain.com Send a bell, receive a free bell!
Re: My front brake install, with pics.
« Reply #15 on: June 09, 2012, 11:50:47 AM »
Excellent post.  I haven't done my own brakes yet, but this gives me the confidence to give it a try.  Thanks.  :)
Ride Safe!  Mark Turkel
http://www.RideBellChain.com
2012 Black Kawi Concours 14, 2008 Yami Royal Star Venture

Offline C1xRider

  • Full Member
  • ***
  • Posts: 836
  • Country: us
  • Where did all the posts go?!??
Re: My front brake install, with pics.
« Reply #16 on: June 09, 2012, 12:19:47 PM »
Most excellent tutorial.  Certainly worthy of being in the Wiki.  That's the kind of stuff that makes this forum great!

Keep up the great posts, even if Brakes are your only specialty.  Just an explanation of a procedure with pictures is usually what people need to get the confidence they need to tackle a job.

One word of caution to folks out there is to be careful where they are spraying Brake Cleaner.  It is also harmful to paint, even powder coating (like wheels).  It's still the best cleaner for de-greasing the brake parts, but just be cautious of where the over spray is going.
--------------------   BACK UP YOUR DISKS PEOPLE!! -------------------------------
2012 K1600 GTL 8), 2010 C14 ABS, 2002 HD FXSTDI, 2000 XT350, 1998 C10, 1983 V65 Magna, 1978 HD SX250

Offline jamiemac

  • Full Member
  • ***
  • Posts: 605
  • Country: us
Re: My front brake install, with pics.
« Reply #17 on: June 09, 2012, 01:11:32 PM »

One word of caution to folks out there is to be careful where they are spraying Brake Cleaner.  It is also harmful to paint, even powder coating (like wheels).  It's still the best cleaner for de-greasing the brake parts, but just be cautious of where the over spray is going.

Definitely worthy of note. Brake clean is tough on paint and powdercoat finishes. It is however, excellent for getting the grease stains out of cloth upholstery. An old mechanics trick of mine, when one of My technicians would pull a dumbass, and get grease on a customers upholstery, was to spray brake clean on a shop towel, and dab at the grease, & it almost always got it out. Did a better job than a professional shampooing.
2008 C14, Area-P carbon fiber, PCV, Rostra Cruise, LAAM leather seat, Optilux 1500 & MondoMoto MM10 lights, Cee Bailey windshield, BMC air filter, Warm & Safe dual dash mounted heat troller.

Offline So Cal Joe

  • Full Member
  • ***
  • Posts: 639
  • Country: us
Re: My front brake install, with pics.
« Reply #18 on: June 09, 2012, 02:02:41 PM »
Great write up. Just 1 question. When you flush the brake fluid you are using the gravity method right? With the pads out you don't want to pump the lever. On a linked brake system isn't there is a special way to bleed the system?

If you are born once you will die twice
If you are born twice you will die once

Offline jamiemac

  • Full Member
  • ***
  • Posts: 605
  • Country: us
Re: My front brake install, with pics.
« Reply #19 on: June 09, 2012, 02:14:18 PM »
Great write up. Just 1 question. When you flush the brake fluid you are using the gravity method right? With the pads out you don't want to pump the lever. On a linked brake system isn't there is a special way to bleed the system?
Yes! Great question, & I'm glad You brought it up.

Flushing the fluid as part of routine maintenance is with the gravity method. It's not advisable to pump the brake lever with the pads out. If it happens by accident, it wouldn't pop the pistons out, but when the lever returns, it would suck air back in the system. Once air is introduced to the system, then a pressure bleeder may be necessary to get the air back out.

On antilock brakes on some cars, You have to go through a special procedure to bleed the brakes. Most of those complicated systems were made by Bosch, & to say they sucked, would be an insult to things that suck.

Our bikes antilock system is of the solenoid type, & thankfully the solenoids are in the open position when not active, so the fluid will drain with no problem. The linked brake system should bleed the same way, although, for the frt caliper that is linked to the rear brake, it's a good idea to check the fluid level in the rear master cylinder.
« Last Edit: May 15, 2017, 12:29:38 PM by jamiemac »
2008 C14, Area-P carbon fiber, PCV, Rostra Cruise, LAAM leather seat, Optilux 1500 & MondoMoto MM10 lights, Cee Bailey windshield, BMC air filter, Warm & Safe dual dash mounted heat troller.